Introduction: Unifying Your Digital Presence
In the modern digital ecosystem, a fragmented approach to audience engagement is a recipe for missed opportunities and stagnant growth. For creators, entrepreneurs, and businesses leveraging WordPress, the integration of a powerful marketing automation platform is not a luxury—it is a strategic imperative. This comprehensive guide provides a definitive, step-by-step tutorial for mastering the synergy between WordPress and Kit, the evolved platform from ConvertKit. We will dissect the process of setting up a seamless, automated system that transforms your website from a static brochure into a dynamic hub for email list building, sophisticated marketing automation, and robust membership management. Whether you are an AI user seeking to automate workflows, a copywriter aiming to nurture your audience, or a designer looking to create exclusive content areas, this guide offers the actionable help and detailed info you need. By the end of this tutorial, you will possess the knowledge to deploy a fully integrated marketing engine that captures leads, delivers value, and builds a sustainable, revenue-generating community directly from your WordPress site. The mastery of these tools empowers you to own your audience relationships, moving beyond algorithmic dependence to create a truly independent digital asset.
![]()
Source: logos-world.net
Understanding Kit: The Evolution from ConvertKit
Before diving into integration, it’s crucial to understand the platform at the heart of this system. Kit represents the next generation of ConvertKit, built with creators and small businesses in mind. It retains all the powerful email marketing and automation features ConvertKit is known for while introducing enhanced capabilities for commerce and community building.
Key Evolution Points:
- Unified Platform: Kit moves beyond being just an email service provider (ESP). It is designed as an all-in-one creator marketing platform, integrating email, landing pages, commerce, and membership sites.
- Enhanced Commerce Tools: Native features for selling digital products, subscriptions, and physical goods reduce dependency on multiple third-party plugins.
- Streamlined Interface: The user experience is refined for clarity, making complex automation visual and manageable.
- WordPress-Centric Philosophy: While a standalone platform, Kit offers deep, native-feeling integration capabilities with WordPress, acknowledging it as the dominant CMS for serious creators.
This evolution makes Kit not just a tool for sending broadcasts but the central nervous system for your creator business, with WordPress serving as the public-facing body.
Phase 1: Foundational Setup and Integration
Prerequisites and Account Configuration
Begin by ensuring you have the necessary components in place. You will need a self-hosted WordPress.org website (not WordPress.com) and an active Kit account. If you are new to Kit, sign up for a plan that suits your subscriber count and desired features, paying particular attention to levels that include membership functionality if that is a core goal.
- Secure Your Kit Account: Choose a plan and complete your profile setup. Configure your default sending email address (e.g., newsletter@yourdomain.com) and ensure you have authenticated your domain within Kit’s settings. This critical step maximizes email deliverability by aligning your sends with your domain’s SPF and DKIM records.
- WordPress Preparation: Log into your WordPress admin dashboard. Ensure your theme is updated and you have a recent backup of your site—a best practice before installing new plugins.
Installing and Configuring the Official Kit Plugin
The most robust method for integration is via the official Kit plugin for WordPress.
- Navigate to Plugins > Add New within your WordPress admin.
- In the search bar, type “ConvertKit” (the plugin name may still reflect the former brand at the time of writing).
- Locate the official “Kit (by ConvertKit)” plugin and click “Install Now,” followed by “Activate.”
- Once activated, a new “Kit” menu item will appear in your WordPress sidebar. Click on it to begin configuration.
- You will be prompted to connect your WordPress site to your Kit account. Click the connection button, which will redirect you to Kit’s site for authorization. Grant the necessary permissions to establish the link.
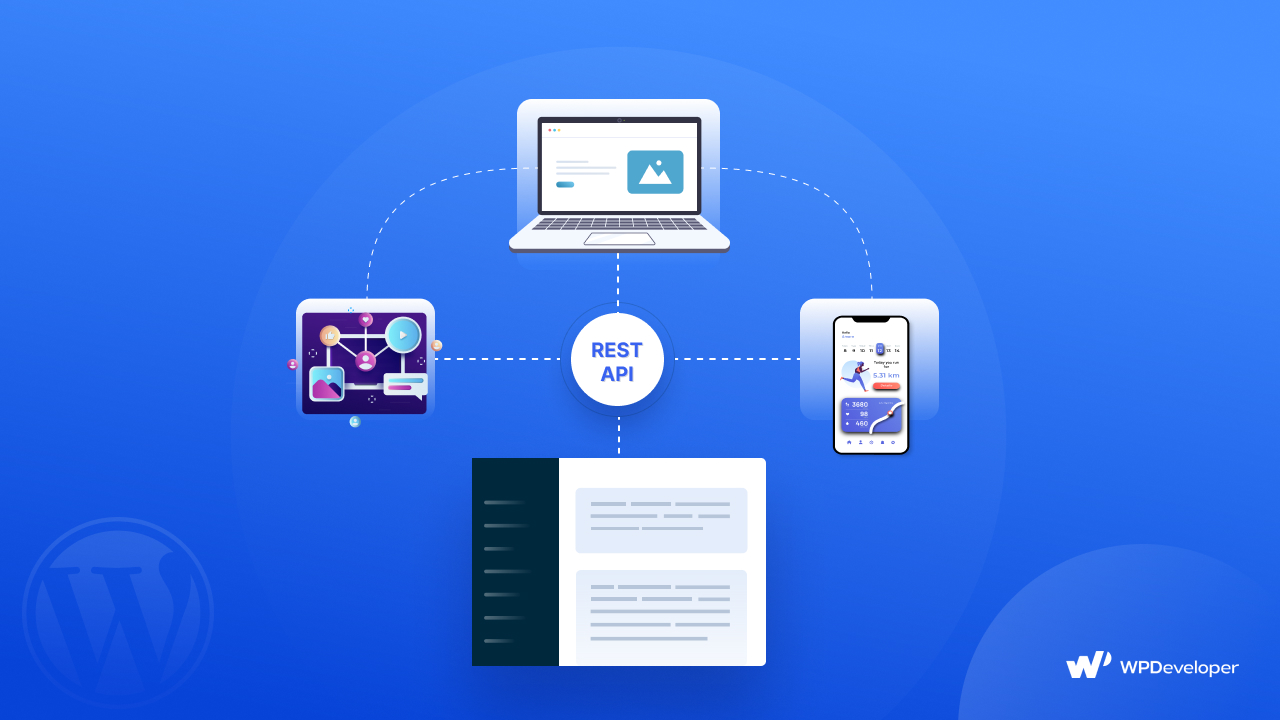
Pro-Tip: The plugin connection creates a secure API key bridge, allowing data to flow bi-directionally between your website and your Kit audience lists.
Initial Plugin Settings and Sync
After connection, delve into the plugin settings to tailor the integration.
- Default Forms: Select which Kit form (e.g., your primary lead magnet opt-in) should be used as the default across your site.
- Post Settings: Enable options to automatically add a subscription form to the bottom of your blog posts or pages. This is a foundational marketing tactic for converting readers into subscribers.
- Tagging: Configure settings to automatically add specific Kit tags to subscribers based on their actions on your site (e.g., “Visited Pricing Page”). This level of automation is where powerful segmentation begins.
Phase 2: Email Marketing Mastery on WordPress
With the foundation set, we now build your lead generation and nurturing engine.
Creating and Embedding High-Convertin Opt-In Forms
Kit provides multiple form types: inline, modal, slide-in, and sticky bar. Your choice should align with user intent and page layout.
- Build in Kit: Within your Kit dashboard, navigate to Growth Tools > Forms. Create a new form tailored to a specific offer (e.g., “AI Prompt Engineering Checklist”).
- Design for Conversion: Use clear, benefit-driven headlines and minimal fields (often just name and email). Kit’s visual editor makes this straightforward.
- Embed on WordPress:
- Using the Block Editor (Gutenberg): Create a new post or page. Add a new block and search for “Kit.” You will find blocks for specific forms or a general Kit block to select your form from a dropdown.
- Using Shortcodes: The plugin generates a unique shortcode for each form (found in the Kit form settings in WordPress). You can paste this shortcode into any shortcode-aware area, including classic editor widgets or theme-specific sections.
- Using Widgets: Navigate to Appearance > Widgets and add the “Kit Form” widget to your sidebar or footer areas for site-wide visibility.
Strategic Placement: For a comprehensive marketing approach, place a sticky bar form site-wide, use modal forms for high-intent landing pages, and inline forms within relevant blog content.
Setting Up Automated Email Sequences (Automations)
Automations are the core of intelligent email marketing. They allow you to deliver the right message at the right time without manual intervention.
- Map the Journey: Define a subscriber’s path. Example: Subscriber opts in for a lead magnet > Receives thank you email with download > Gets a 3-part email course over 3 days > Receives an invitation to a related paid product.
- Build in Kit: Go to Automations in Kit. Use the visual automation canvas.
- Trigger: Set the trigger as “Subscribes to a form” and select your lead magnet form.
- Actions: Drag and drop email steps onto the canvas. Write each email to provide incremental value. Use delays between steps to pace the sequence.
- WordPress Integration: The trigger for this automation is already connected via the form you embedded. For more advanced triggers (e.g., “Makes a purchase”), you will need to integrate your membership or e-commerce plugin, covered in Phase 4.
Mastery Insight: The true power lies in using tags. Add a tag like “Downloaded AI Guide” when the first email is sent. This tag can then trigger future, more specific automations, creating a sophisticated segmented nurture flow.
Phase 3: Advanced Marketing Automation and Segmentation
Move beyond basic broadcasts to behavior-driven marketing.
Leveraging Tags for Dynamic Segmentation
Tags in Kit are labels you apply to subscribers based on their behavior, interests, or data. They are the key to personalized communication.
How to Apply Tags from WordPress:
- Form Submissions: Different forms can apply different tags automatically.
- Link Triggering: Use Kit’s “Link Trigger” feature. Create a unique tracked link in Kit for a specific action (e.g., “Clicked on Design Portfolio”). When a subscriber clicks this link in an email or on your site, they receive a tag. You can place these links in WordPress posts or pages.
- Plugin Actions: The Kit plugin can add/remove tags when a user views a specific category of post or page, though this may require additional custom configuration or a dedicated tagging plugin.
Creating Targeted Broadcasts
Use your tags to send hyper-relevant broadcasts.
- In Kit, click Create Broadcast.
- Instead of sending to “All Subscribers,” click on the audience selector and choose “Subscribers with any of these tags” or “Subscribers with all of these tags.”
- Compose a email that speaks directly to that segment (e.g., “For our AI Enthusiasts: New Model Update Analysis”).
This method ensures your email content has maximum relevance, boosting open rates, click-through rates, and subscriber satisfaction.
Phase 4: Membership Site Integration and Monetization
This phase transforms your WordPress site into a gated community and revenue stream.
Conceptualizing Your Membership Model
Define your offering:
- Content Type: Video courses, written tutorials, design templates, AI prompt libraries, private podcasts.
- Access Tiers: Free, Premium (single product), All-Access (subscription).
- Delivery Platform: While Kit has native membership features, many users prefer dedicated WordPress membership plugins for their deep CMS integration.
Integrating a WordPress Membership Plugin with Kit
We will use a popular plugin like MemberPress or Restrict Content Pro as an example. The principle is universal: the membership plugin controls site access, while Kit manages the email communication.
- Install Your Membership Plugin: Install and configure your chosen membership plugin on WordPress. Set up your membership levels, payment gateways, and protected content.
- Connect to Kit via Zapier or Native Integration: Most premium membership plugins offer direct integration with Kit or connect seamlessly via Zapier.
- Trigger (Zapier): “New MemberPress Member” or “Subscription Purchased.”
- Action (Zapier): “Add Subscriber to Kit” and/or “Add Tag in Kit” (e.g., “Premium Member”).
- Automate the Onboarding Sequence: In Kit, create a new automation triggered by the “Premium Member” tag.
- Email 1: Immediate welcome, login instructions, and a tour of the member area.
- Email 2 (Day 2): Highlights a key piece of member content.
- Email 3 (Day 5): Asks for feedback or encourages participation in a member-only discussion.
Using Kit’s Native Commerce for Simpler Models
For selling a single digital product or a simple subscription without complex site gating, you can use Kit’s native commerce tools. You can then embed Kit’s purchase forms on your WordPress pages using the same block or shortcode method described for email forms. This keeps the entire customer journey within Kit’s ecosystem.
Phase 5: Analytics, Optimization, and Advanced Tips
Mastery requires measurement and refinement.
Tracking Performance
- In Kit: Monitor key metrics in the Dashboard and Reports:
- Email open rate, click rate, and unsubscribe rate.
- Form conversion rates.
- Growth trend of your list.
- In WordPress: Use analytics plugins like MonsterInsights to see which pages drive the most form conversions. Correlate this with your Kit data.
Advanced Integration: Personalizing Content
Use Kit tags to personalize the WordPress experience itself with plugins like If Menu, So, Then....
- Scenario: Show a different call-to-action in your menu or sidebar to users tagged “Designer” vs. “Copywriter.”
- How: The plugin can check if a visitor’s email (often via a cookie set by the Kit plugin) is associated with a tag in Kit and conditionally display content.
Ensuring Deliverability and Compliance
- Always Use Permission-Based Lists: Only email people who explicitly opted in.
- Maintain Clean Lists: Use Kit’s segmentation to re-engage inactive subscribers or remove them.
- Include a Clear Unsubscribe Link: Kit handles this automatically, ensuring compliance with laws like CAN-SPAM and GDPR.
Conclusion: Your Integrated System for Sustainable Growth
You have now journeyed through the complete process of architecting a powerful, automated marketing and membership system by integrating Kit with WordPress. From the initial plugin connection and email form deployment to the advanced orchestration of behavioral tags and the gating of premium membership content, these steps provide a blueprint for sustainable audience growth and monetization. This integration empowers you, whether as an AI practitioner, copywriter, or designer, to focus on creating exceptional value while the system works tirelessly in the background to attract, nurture, and retain your community. The synergy between WordPress’s content management prowess and Kit’s marketing automation intelligence creates a business asset that is greater than the sum of its parts.
To continue mastering the art of automated, persuasive communication and to access exclusive resources on leveraging AI for content creation, ensure you are part of our inner circle.
Subscribe Now to our private newsletter. You’ll receive advanced tutorials, template workflows, and case studies that delve deeper into automating your creative business, directly building upon the foundation laid in this guide.
FAQ Section
Q: Is the Kit plugin different from the old ConvertKit plugin?
A: The plugin is the same and receives continuous updates. It seamlessly connects your WordPress site to your account, whether it’s branded as ConvertKit or Kit.
Q: Can I use Kit for my membership site without another plugin?
A: Kit has native membership and product features for selling and protecting content. For very simple, standalone products, this can be sufficient. However, for deep integration with WordPress content, forums, or complex tiered access, a dedicated membership plugin integrated with Kit is often more powerful.
Q: How does this integration help with GDPR compliance?
A: The Kit plugin and platform provide tools to manage consent. Forms can be configured to include explicit consent checkboxes, and all subscriber data and consent records are managed within Kit, which offers features to handle data export and deletion requests.
Q: I’m an AI content creator. How can I automate content updates to my list?
A: You can create an automation in Kit triggered by a new WordPress post in a specific category (often via RSS feed trigger or using a third-party service like Zapier). This can automatically send a broadcast or add subscribers to a sequence that delivers your latest AI analysis or prompt pack.
Q: What’s the best way to A/B test my forms?
A: Kit allows you to create A/B tests for your forms directly within its dashboard. You can test different headlines, button colors, or field counts. The results are displayed clearly, telling you which variant drives higher conversions. You can then update the embedded form on WordPress with the winner.
Internal Linking Suggestions:
- Anchor Text: “best practices for email deliverability” → Link to an internal article on email setup and SPF/DKIM.
- Anchor Text: “choosing a WordPress membership plugin” → Link to a comparative review of MemberPress vs. Restrict Content Pro.
- Anchor Text: “using AI for email copywriting” → Link to a resource page about AI writing tools.
External Link Suggestion:
- For enhancing your automated content creation within these workflows, explore advanced AI tools available at https://app.rapidtextai.com/.
Prerequisites — What you need before starting
- An active Kit account (sign up at your Kit dashboard)
- Administrative access to your WordPress site (WP Admin)
- Ability to install plugins or add custom code to WordPress
- Optional: Membership plugin (MemberPress, Paid Memberships Pro, Restrict Content Pro), or WooCommerce if selling access
Overview: High‑level integration steps
- Create or configure your Kit account and API key
- Install the Kit WordPress plugin or connect via third‑party plugins
- Create forms, landing pages, and automation sequences in Kit
- Embed forms and tag users on WordPress pages and membership flows
- Set up membership gating and test workflows
- Monitor analytics and optimize
Step 1 — Create and configure your Kit account
Start by logging into Kit and completing the following setup tasks:
- Complete your profile and sender email (use a verified domain if possible for better deliverability)
- Create standard tags that match your site structure (e.g., lead, paid_member, free_trial, course_signup)
- Draft your first Sequence (welcome series) and Automation rules (e.g., tag triggers)
- Generate an API key for WordPress integration (from Account → Settings → Integrations)
Tip for AI users: Use dataset‑driven subject line testing. Store top performing subject lines in a sequence variant for automated multi‑arm testing.
Step 2 — Install and connect Kit plugin on WordPress
Use the official Kit WordPress plugin or integrate via form builders like WPForms, Gravity Forms, or MemberPress. Here’s how to set up with the official plugin:
Install the Kit (ConvertKit) plugin
- Go to WordPress Admin → Plugins → Add New
- Search for “Kit” or “ConvertKit” and install the official plugin
- Activate the plugin
Connect Kit to your WordPress site
- In WP Admin, go to Settings → Kit
- Paste your API key and API secret (if applicable)
- Save and test the connection — you should see confirmation that WordPress is connected to Kit
Alternative: If you use WPForms/Gravity Forms, install their Kit add‑on and connect using your API key to sync leads to Kit automatically.
Step 3 — Build high‑converting forms and landing pages
Forms are the gateway to your Email Marketing list. Follow these design and copy tips:
- Use a single, clear CTA and minimal fields (email + name is ideal)
- Place forms above the fold, in the footer, and as exit intent popups
- Design mobile‑first — many visitors will come from small screens
- Use social proof and concise benefit bullets
Creating forms in Kit
- In Kit, go to Forms → Create New
- Choose inline, modal, or landing page
- Design with your brand — match fonts and colors for higher trust
- Set form actions: add tags, subscribe to sequences, redirect on submit
- Copy the embed code or use the WordPress plugin to add the form by selecting it in the plugin’s UI
Designers: export Kit form styles as a CSS snippet and include them in your theme stylesheet for pixel‑perfect integration.
Step 4 — Tagging, Segmentation, and Automation
Tagging is the core of Kit’s flexible segmentation. Use these best practices:
- Create functional tags (e.g., source_blog_post_x, webinar_attendee, bought_course_y)
- Avoid over‑tagging; keep a tag taxonomy document to standardize names
- Use segments for high‑value audiences (e.g., recent purchasers, engaged readers)
Setting up automation rules
- Create a new Automation in Kit
- Choose a trigger: tagged, form subscribed, product purchased
- Set actions: add to sequence, add tags, send internal notification, or apply delay
- Test thoroughly with a staging email
Copywriters: craft a welcome sequence that primes prospects for your main offer — use a 3‑email sequence: value, social proof, conversion CTA.
Step 5 — Integrating Memberships: Gate content and sync member data
To monetize via memberships, you’ll typically use a WordPress membership or eCommerce plugin and connect it to Kit to manage member communications.
Common integration patterns
| Membership Plugin | How to Integrate | Kit Actions |
|---|---|---|
| MemberPress | Use MemberPress hooks or Zapier to add tags on purchase | Tag members, subscribe to member sequences |
| Paid Memberships Pro | Use built‑in integrations or webhook add‑ons | Apply membership tags, trigger onboarding sequence |
| WooCommerce | Use Kit’s commerce or use webhooks/Zapier to tag customers | Post‑purchase emails, access expiration reminders |
Example — gating content with tag based access
- On purchase, your membership plugin triggers an API call (or Zapier) to Kit to add tag “paid_member”.
- In WordPress, check for “paid_member” tag via Kit plugin to show/hide content or shortcodes.
- Send onboarding & onboarding drip via Kit sequences targeted to the “paid_member” tag.
Designers: use distinct member dashboards and style them consistently with the rest of the site. Copywriters: build an onboarding email series that reduces churn in the first 14 days.
Step 6 — Testing, Deliverability, and Analytics
Before launching, run comprehensive tests:
- Subscribe using multiple email providers (Gmail, Yahoo, corporate) to verify delivery
- Test forms on desktop and mobile; inspect JS conflicts that may block embeds
- Use Kit’s analytics for open/click rates, and integrate with Google Analytics for conversions
- Set up DMARC, DKIM, SPF for your sending domain to maximize deliverability
For server control and email infrastructure help, see our technical guide on setting up a mail server: Setting up Mail Server with Mailcow (internal guide).
Advanced Tips: AI, personalization, and dynamic content
AI users can automate subject line generation, email personalization tokens, and dynamic content selection. Practical ideas:
- Use AI to generate 10 subject line variants, A/B test top 2
- Insert personalized recommendations based on tags and past purchases
- Automate behavioral triggers: page visit → add tag → send targeted email
Copywriters and designers should collaborate on modular email templates. Use reusable blocks for headers, testimonials, and CTAs to speed iteration.
Mini Case Study: Designer + Copywriter ↓ Membership Funnel
Scenario: A course designer sells a membership course on WordPress. Workflow implemented:
- Designer creates landing page and embedded Kit form.
- Copywriter drafts a 5‑email onboarding sequence in Kit.
- MemberPress handles access; on purchase, a webhook tags the user “course_student”.
- Tagged users are added to the “course onboarding” sequence; designer uses dynamic content to highlight next lesson.
- Result: 28% increase in first‑week engagement and 12% lower churn.
FAQ — Quick answers for common scenarios
Can I use Kit with any WordPress theme?
Yes. Kit embeds are theme‑agnostic, though you may need minor CSS tweaks for perfect alignment. Designers should add a dedicated stylesheet for Kit embeds.
Can I tag users automatically when they buy a product on WooCommerce?
Yes. Use Kit’s commerce features or middleware (Zapier, Make) or direct WooCommerce hooks to tag customers on purchase.
What membership plugins work best with Kit?
MemberPress, Paid Memberships Pro, Restrict Content Pro, and WooCommerce are common choices. Integration often uses webhooks, plugins, or Zapier.
How do I protect member content and sync it with Kit?
Use your membership plugin to control content access and call Kit’s API/webhooks on membership events (registration, renewal, cancellation) to keep tags synced.
SEO & Social Sharing Optimization
Recommended meta tags and social snippets to improve sharing and search visibility:
- Meta Title: Step‑by‑Step Kit (ConvertKit) & WordPress Integration Guide — Email Marketing & Membership
- Meta Description: Comprehensive tutorial to set up Kit with WordPress. Learn forms, automations, membership gating, and advanced email marketing tips for designers, copywriters, and AI users.
- Open Graph: Use an engaging image (1200x630) and description above for social shares.
Schema Markup Recommendation
Include an Article JSON‑LD for better SERP appearance. Example schema elements to include:
- @type: Article
- headline, description, author, datePublished, image, publisher
- mainEntityOfPage: the article URL
Implement JSON‑LD in the head of your WordPress theme or via an SEO plugin (Yoast/Rank Math).
Troubleshooting & Common Pitfalls
- Forms not loading: Check for JS conflicts and caching — temporarily disable other plugins to isolate
- Tags not applied: Verify API key permissions and that membership plugin is triggering the webhook correctly
- Email deliverability issues: Verify DNS records (SPF, DKIM) and warm up sending domain
- Design mismatch: Add a Kit CSS override file to unify styles across embeds
Next Steps & Checklist
- Create Kit account and generate API key
- Install Kit plugin and verify connection in WP Admin
- Create primary forms and landing pages; embed on strategic pages
- Design sequences: welcome, onboarding, retention
- Integrate membership plugin and set tag triggers for purchase/renewal
- Test deliverability and set up analytics tracking
- Iterate with A/B tests for subject lines, form copy, and CTAs
Resources & Further Reading
- Official Kit site and documentation (access from your Kit dashboard)
- Internal mail server tutorial for advanced deliverability control: Setting up Mail Server with Mailcow
- Expert services and implementation help: Hire The Expert
Conclusion — Build, Automate, and Scale
Integrating Kit (formerly ConvertKit) with WordPress gives creators, AI product teams, copywriters, and designers a powerful, tag‑based email marketing and membership ecosystem. By following this step‑by‑step guide you’ll capture leads, deliver targeted onboarding, and gate content for paid members with minimal friction.
Ready to accelerate your setup and avoid common pitfalls? Hire The Expert today to implement Kit on your WordPress site, design conversion‑focused forms, and build the automations that increase retention and revenue. Visit Hire The Expert to get started.
Final FAQ / Quick Reference
- Need immediate help? Use the Hire The Expert link to request implementation services.
- Want to self‑host emails? See our mail server setup guide: Mailcow tutorial.
- Best tip for copywriters: Focus on the first 3 emails in the sequence — they determine long‑term engagement.
Publishing & Accessibility Notes
- Image alt text suggestions: “Landing page Kit form on WordPress”, “Membership dashboard with Kit integration”, “Email sequence open rate analytics”.
- Internal links: open in same window; example: Mailcow setup.
- External links: open in a new window with rel="noopener" (example: Hire The Expert).